I think it might be interesting to write down all the info about my participation in the When Prague Meets Shanghai contest as it eventually became one of the milestones in my fight for resurrecting the nixie tubes manufacture.

I had just finished the garden shed in the summer 2013 and immediately moved my tube making equipment to it. I was pretty eager to push the research forward because I spent too much time by digging in the soil and hammering nails. I didnt take long and I made a wierd looking, but fully functional nixie tube.
By that time, I started to think about making a clock using my own tubes. But because I am more technician than artist, I began serching for a designer who would prepare the look of the new clock. I came accross an advertisement for a contest for glass-making artists called When Prague Meets Shanghai. It was arranged by well known company Preciosa lighting and Museum of glass in Shanghai, on very professional basis, so I decided to try luck and apply for it.
The contest was opened to artists under 35 years, making the glass in Czech republic. There would be picked 20 finalists from all registered into the contest and their twenty artworks would be sent to large Museum of glass in Shanghai for a three months long exhibition. Visitors of the exhibition would vote for the best one and the maker of it would win a four weeks long glass-making workshop in Shanghai.. Great motivation to make something really cool!
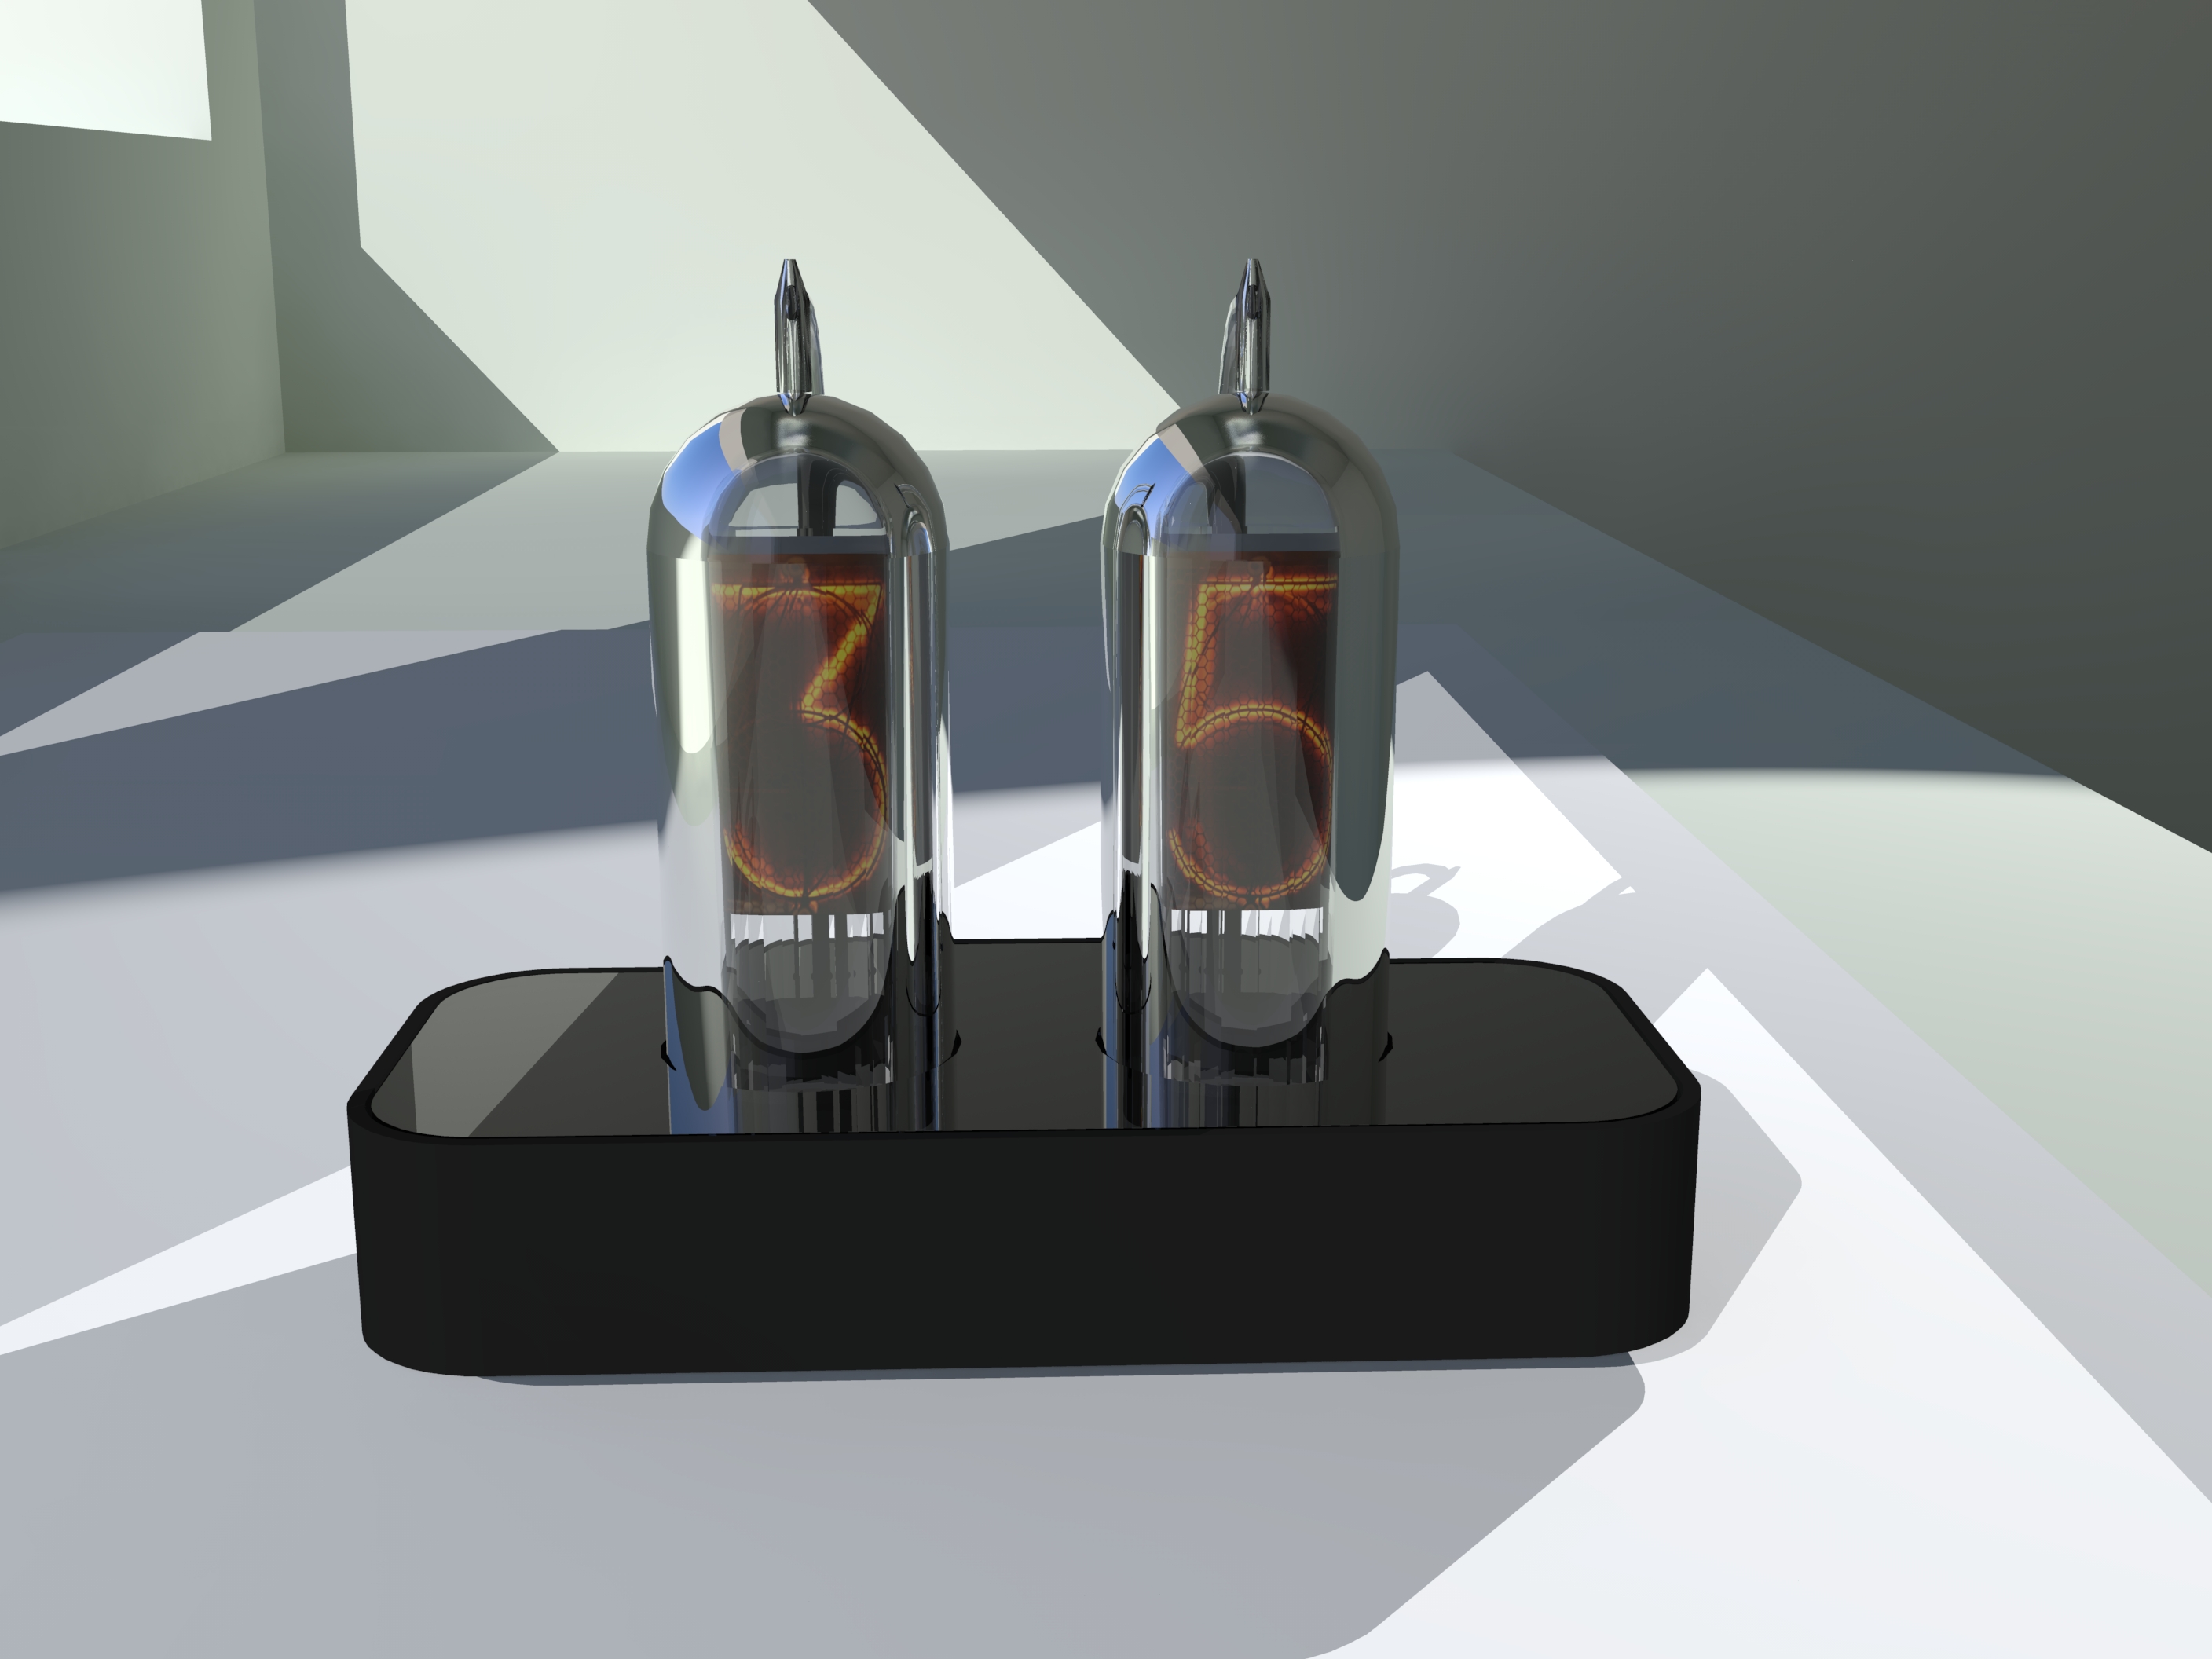
First, I had to send application form together with photos of the subject being registered to the contest, but I had nothing to show. So, I decided to make a visualization and try to pass the selection comitee with it. During few days, I sketched a simple and clean design for two-tube clock. Just two because struggling for more could easily end up by fail. It was contest focused on glass, so I chose black matte anodized aluminum body for the clock with black glass top board. There would be two LED indicators (Power on and seconds) below the glass board, illuminating laser-engraved circles. Two nixie tubes sticking through the glass board, the nixie tubes will have a glass tubing on the back. This was meant as a design element and I also planned to lead the anode wire through it. This all should represent an unobtrusive design that would let the tubes to be dominant point of the piece. And I also didn’t want to be turned down from the contest because my artwork contains electronics and parts from metals..
It was October and deadline for handing artworks over was November 04, 2013, less than two months – short time to go from a crappy tube to real clock that would not shame me by failing in the middle of the exhibition ;-) I got to work immediately after sending the submission. I thought the most complicated part would be the aluminum body, so I started with that. It took me few days to find out that I need a 3D software cabable of working with solid models. I chose a ViaCAD 2D/3D, not bad software for $99. I was able to model the body easily using ViaCAD in combination with QCAD for 2D drawing.

First problems appeared when I tried to find a company that would be able to CNC-mill it for reasonable price. After long discussion, I got first offer, $600 + VAT, I was shocked! This was too much, so I continued in looking for another company, but no luck. I then got great idea to look for a machinist on a local machinist forum, I got two reasonable-priced offers in a few days. I ordered a prototype from both, just to be sure. The price for the prototype was around $170 and I got first one in two days!
The bottom lid was cut on water jet from 2mm aluminum sheet, no problem at all. I took both, the case and lids for black matte anodizing. I was a bit afraid of how it will eventually turn out as anodizing is a kind of alchemy. I had to smile when I saw the result, it was so great!

The next step was the glass board that would go on the top of the aluminum body. I originally planned to use a black glass, cut it on the water jet and laser-engrave circles for the LED indicators. However, it turned out to be pretty difficult to obtain it, even smoked glass was almost impossible to find, and if so, it was very expensive. But I happened to find a glass that was from one side covered by a black lacquer and it looked absolutely great, just like really black glass! I got a piece for laser engraving test for free and started looking a company that will make the engraving. I soon found a guy who does engraving to glass and the test came out surprisingly well. So, I made a CAD drawing from the water jet and ordered ten pieces (for $250 in total).
In a few days, I was called to pick up the finished glass. When I saw the result, I was a bit concerned about the look of the edges, they were like sandblasted.. Visible and pretty disturbing stuff, it could not stay that in a clean design I wanted to produce – I had to come up with a way how to make it more visually pleasing ;-) But first, I called the guy with laser engraver, I needed to make the circles to the black lacquer that will serve as indicator lights. When he brought it back, I was quite shocked.. The laser engraving to the black laquer layer was not easy (it made bubbles in it), so he decided to wash out the laquer by hot acetone and apply his own. The laser engravings went out well, but he made tiny scratches in the glass surface, flaked off the edges on some places and under the black laquer was visible dust :-( Sh*t! However, I was able to pick out five pieces in relatively good condition. Next step was to grind the rough edges made by water jet.
I first bought a bunch of various grinding and poslihing tools. The outer edges was quite easy to do, but I was not able to polish the holes inside the glass. I desperately started googling what to do with it and suddenly found a guy, who engrave glass. I sent him five pieces of the glass and it came back in a few days, with nice uniformly grinded edges! Great!
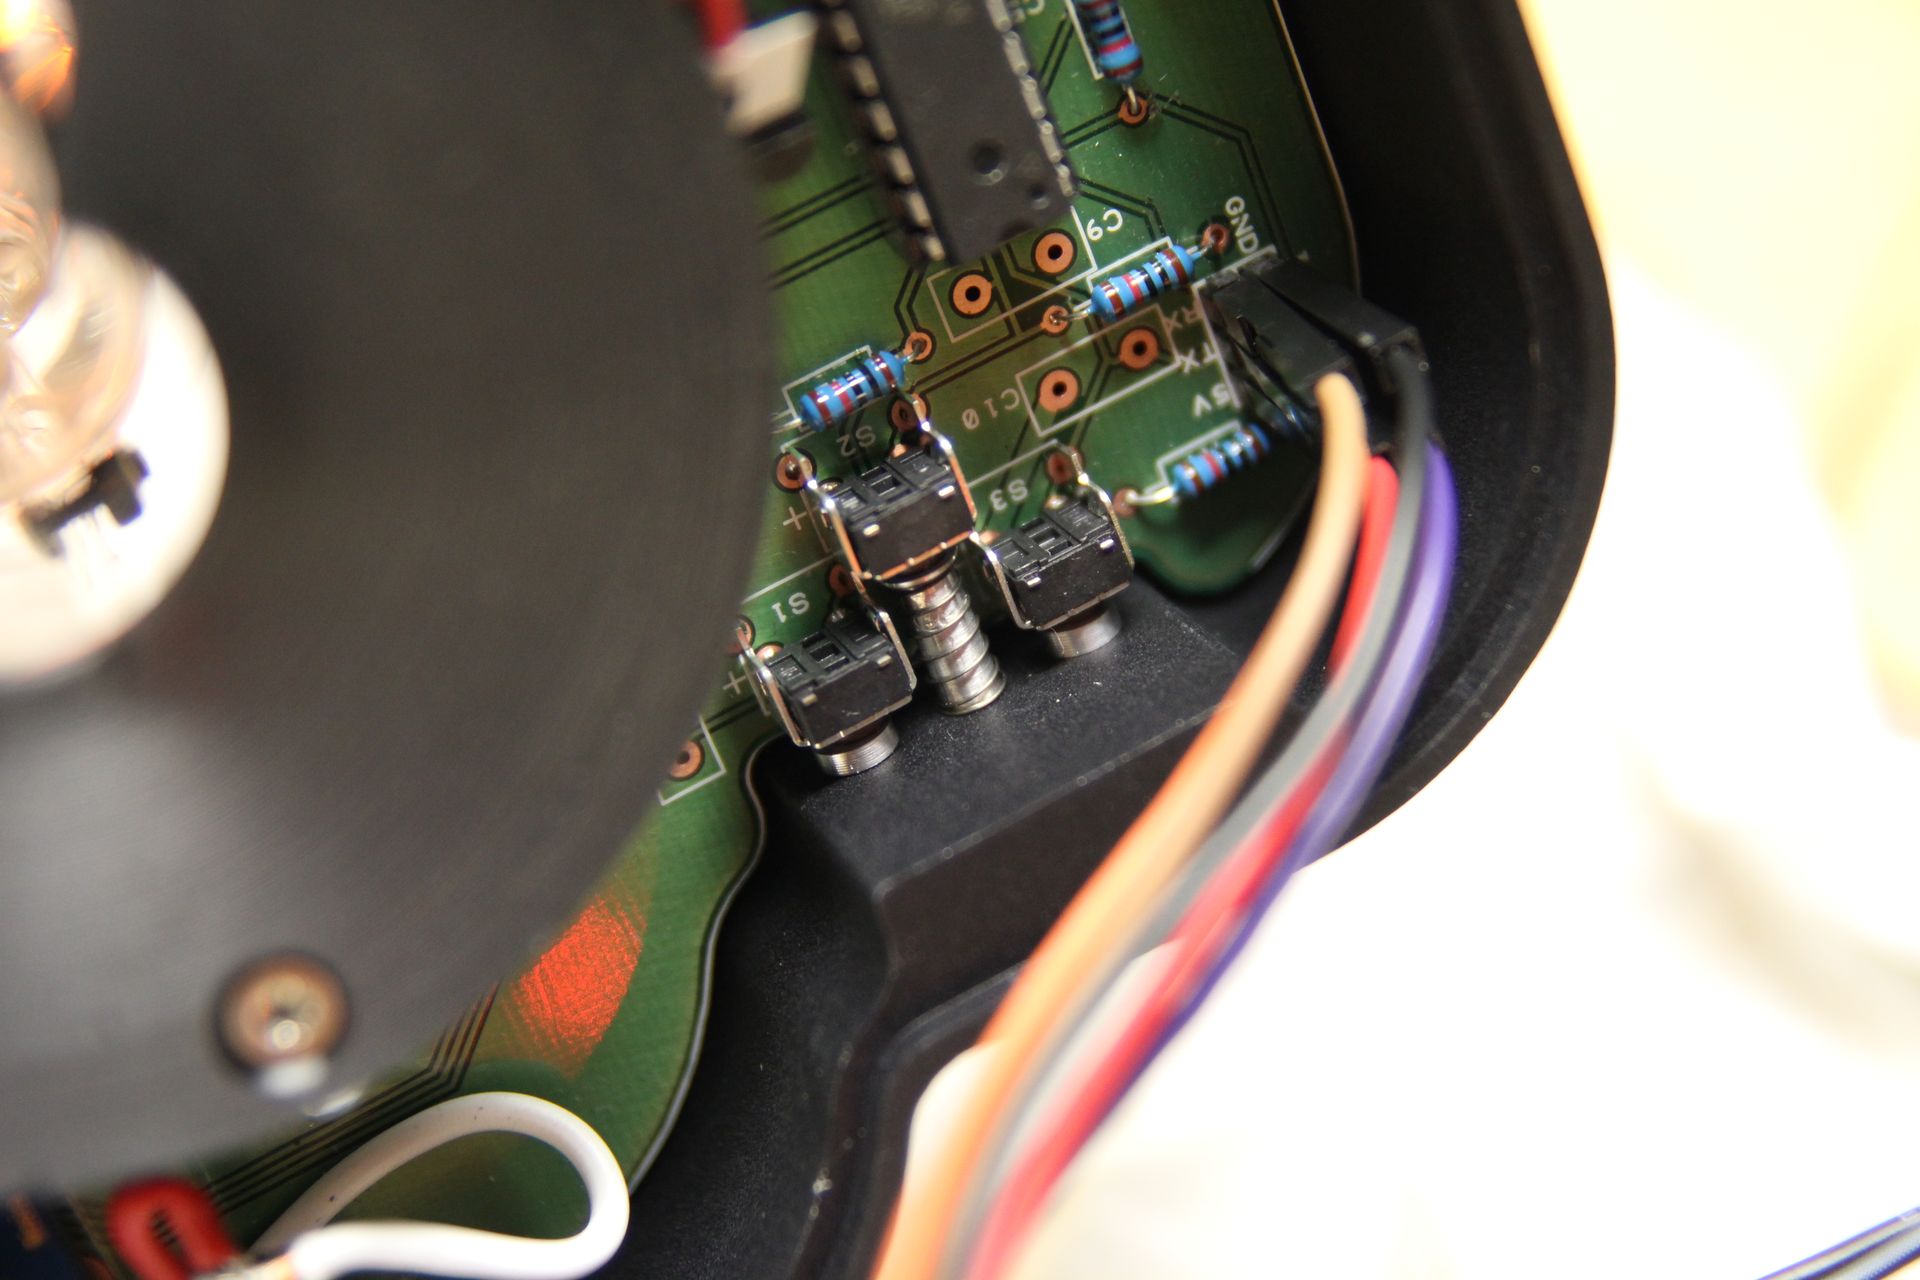
Next step was the electronics. There is nothing much to say, all went flawless. The electronics is based on Arduino, ATmega328. Time is kept by precise DS3231, the high voltage is made by Yan Zeyuan’s HV PSU. Both tubes are direct driven, one tube directly by the ATmega, the second one via 74HCT42, BCD to decimal decoder. There are three buttons from the back, one for hours, one for minutes and one for changing 12/24 time format. The PCB’s were made in Printed.cz, great quality, a little bit more pricey compared to chinese manufacturers, but this is normal.
Another issue to solve was how to hold the tubes in the clock, as I had no socket, just few thin and terribly brittle tungsten wires sticking out of the bottom of the tube. I finally got a rod of Delring plastic, cut few pieces and machined a sockets on the metal lathe. I welded a copper wires to those tungsten electrodes, those wires would later be soldered directly to PCB.


Parallel to all those steps, I worked on nixie tubes itself. It was also very long way and I thought I will never make it. I started with making the stem – vacuum tight connection of the wires through the glass. Sealing 11 wires into glass turned out to be difficult like hell, I made around 40 seals and all were leaky, no one good. I must thank again to Ron Soyland here, I know that he is successful in making this kind of seal, so I continued and finally found a combination of power of the flame during glass work, intensity of the flame during driving out the air from the wire before sealing, right amount of time of heating the wires to make appropriate layer of tungsten oxide on it and some other factors. Finally, I made first few vacuum tight stems and after some practice, I got from 0% to 30% success rate.
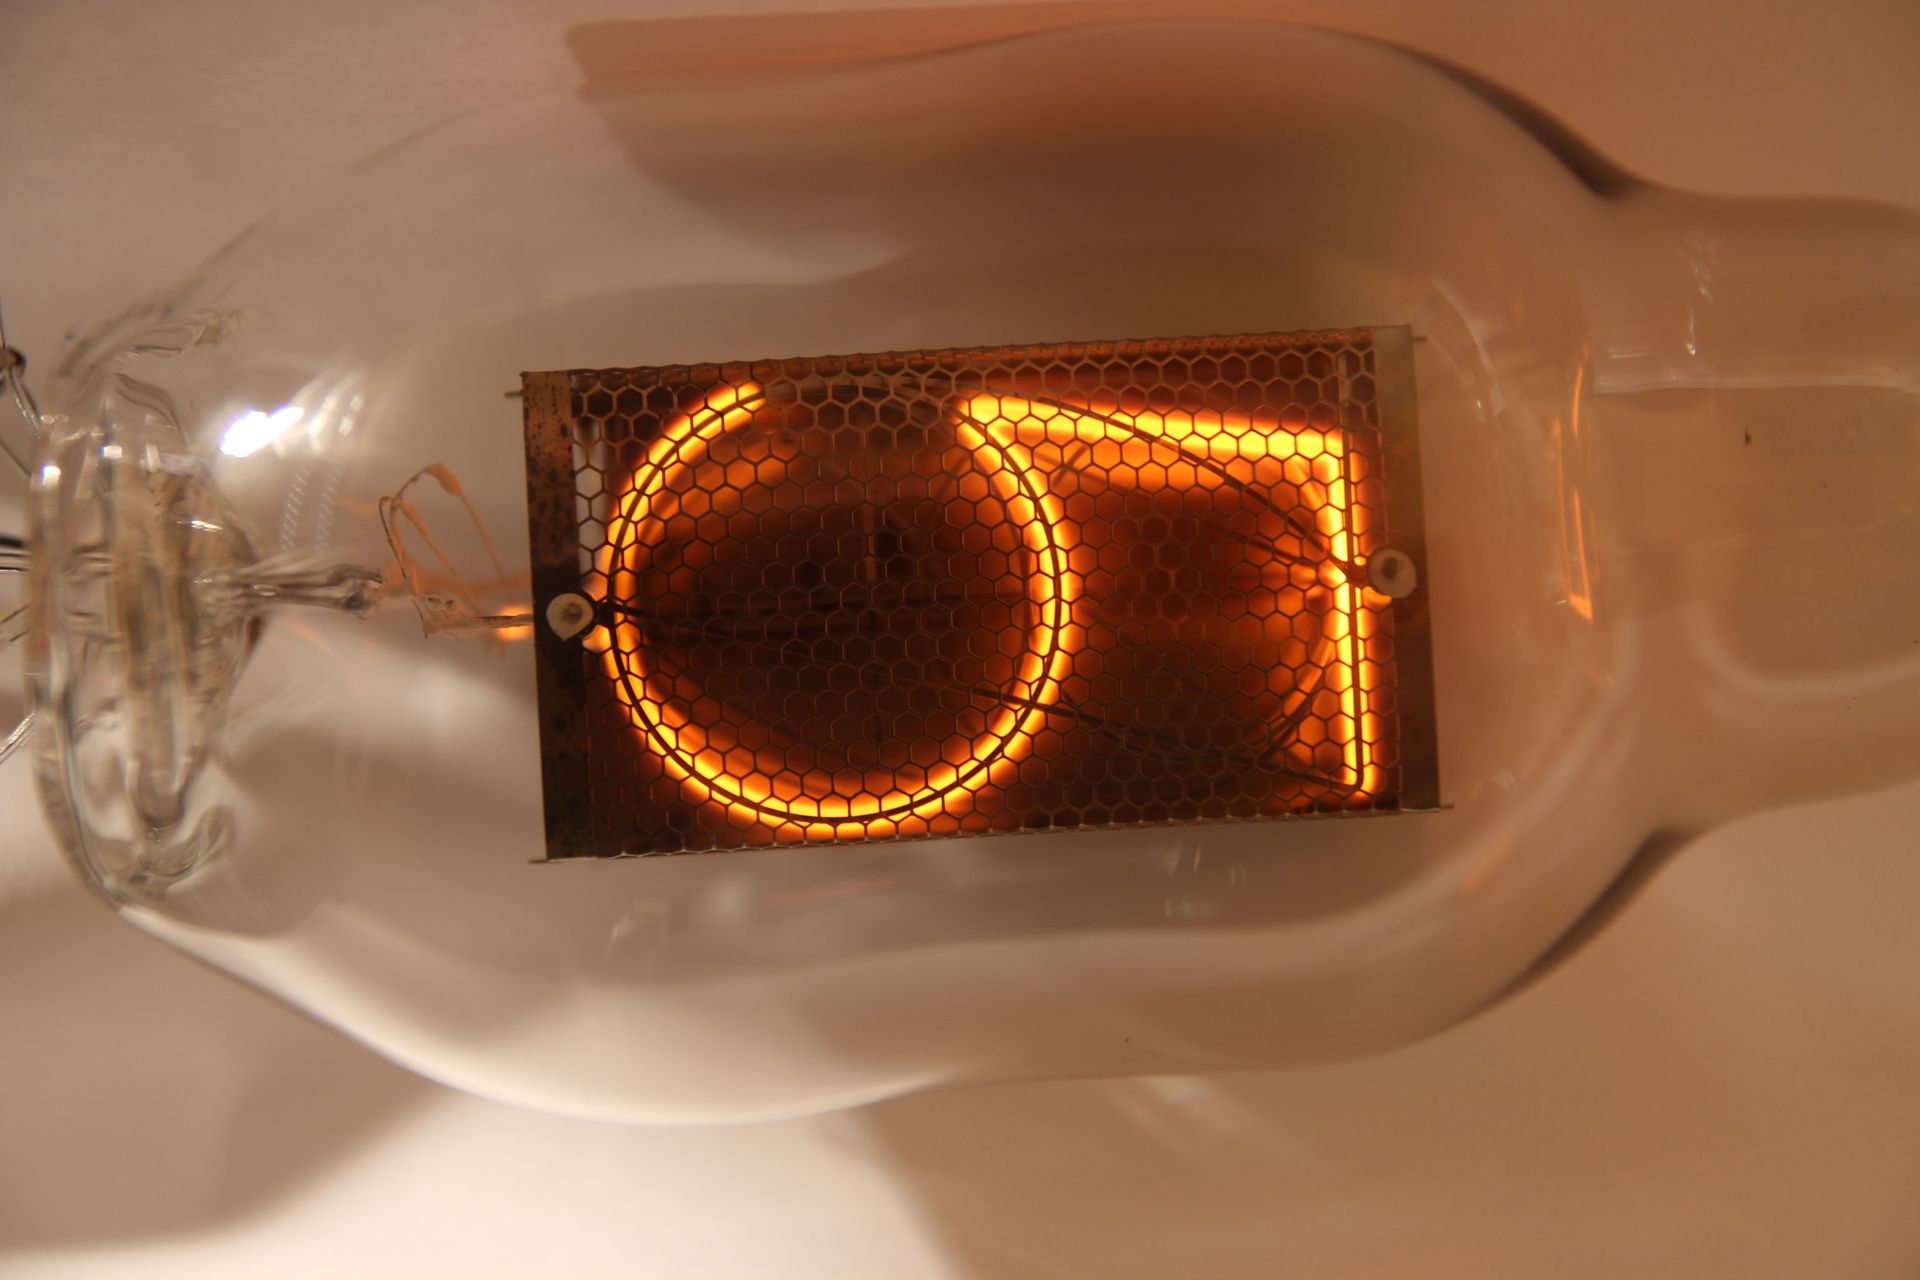
Stem was the most complicated part, but there were many other issues, like breaking mica sheets, breaking ceramics, glowing connecting wires, difficult sealing envelope onto the glass stem with inner assembly.. I had to make around10 tubes to get two of the same shape and proportions ;-) On the picture below is evolution of the nixie tube for ShanghaiTime clock.

I kept the programming as a last step, there were absolutely no problems, however it took much longer then I expected. I was programming it even the last evening before deadline. The next day (November 1, 2013 – this was Friday, Monday 04 was the deadline), I packed the clock carefully and took them to Preciosa. Even today, I remember what a relief it was, like after graduation on high school ;-)

After few weeks, Preciosa arranged a small one-week long exhibition in DOX gallery in Prague, gallery of contemporary art. It was nice reward to take part in the vernissage and see other contestants with their artworks. There was around 80 artworks submitted to the contest! But the main exhibiton took place in Shanghai Museum of Glass, Preciosa packed the 20 chosen artworks (my clock among them) and sent them to China for the exhibiton. I was very scared of cracking the glass in the freezing cargo bay in a plane (they finally chose ship), but all worked well after unpacking ;-)
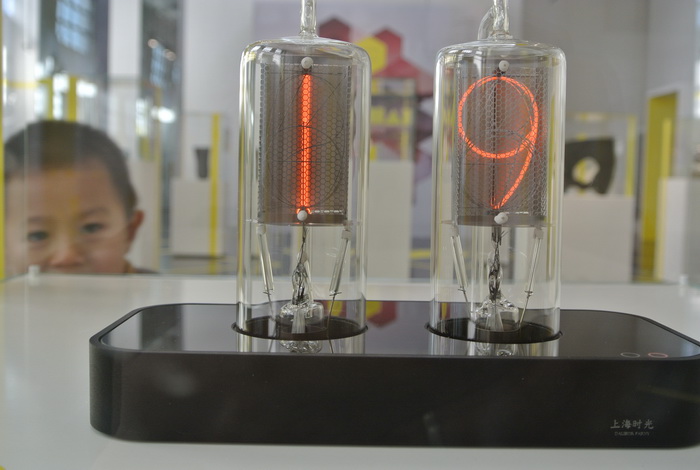


The exhibiton took three months, and visitors finally placed my clock on second place, not bad!
The ShanghaiTime clock took all my autumn 2013, but I don’t regret. It was great competetion, it pushed me hard to make a final product, after all the previous experimenting. I learned that even that it is hard, I am able to make it. Just after this competition, I started to prepare next project, a single tube clock.. But this is another story.. ;-)
I must thatnk here to all Preciosa team for arranging great competition, my wife for support (I was few months only working and working!) and all people who helped me (one name for all – Ron Soyland!).